Today’s topic is How To Cook Ribs On A Grill. Obviously, you can find a great deal of Fast Cook Ribs On Pellet Grill-related content online. The proliferation of online platforms has streamlined our access to information.
There is a connection between the Best Ribs Recipe Grill and Bbq Ribs Recipe information. more searching has to be done for Fast Cook Ribs On Pellet Grill, which will also be related to Original Spare Ribs Recipe.

96 Facts How To Cook Ribs On A Grill | BBQ Ribs in the Oven then Grill Recipe
- Bring the temperature up to 225 degrees F, using the vents on the grill to regulate the temperature. The vents control the amount of oxygen getting to the fire. So less air means less fire. - Source: Internet
- Remove the ribs from the grill and allow to cool for 10-15 minutes. Using plastic wrap, wrap the ribs tightly in a few layers. It’s key here that you don’t use aluminum foil as BBQ sauce and foil can actually react due to the acidic nature of the sauce. - Source: Internet
- To perform a bend test, use a set up tongs to lift up about a ⅓ of the rack. If the remaining ⅔ of the ribs fold over to about a 90 degree angle, they are done. You will also see the rib meat start to crack at the point of the bend. - Source: Internet
- Spare ribs, also known as St. Louis style ribs, tend to be rectangular flat slabs at about 6-inches long vs. the curved rack known as baby back ribs which are about 3-inches on the shorter end. - Source: Internet
- The Test of Time Leave your ribs be. Trust in the cooking method of 3-2-1 and don’t worry about it. Generally, it takes between 5 and 7 hours of slow cooking for the thicker spare/side rib, while it only takes 4 or 5 hours to cook. The thing about timed cooking like this is that variables like meat/bone thickness, outdoor temperature, and more can have a direct effect on the length of time it takes to finish your ribs to perfection. - Source: Internet
- Then you can slather on some more sauce on each rack once they are grilled. You really can never have too much BBQ Sauce. Especially, when it’s homemade! Just be sure to provide some thick napkins for your guests. - Source: Internet
- Once you have managed to peel off the membrane, trim off any excess fat with a pair of meat scissors. If you don’t have scissors, then use a sharp knife. Once you have done this, check the ribs for any loose meat. You will want to remove these so that all you’re left with is a clean and beautiful rack of ribs. - Source: Internet
- Alpha Grillers Grill Brush Bristle Free. Best Safe BBQ Cleaner with Extra Wide Scraper. Perfect 18 Inch Stainless Steel Tools for All Grill Types, Including Weber. Ideal Barbecue Accessories Nutrition Information: Yield: 6 Serving Size: 6 servings (ribs only) - Source: Internet
- Do you love smoked ribs? I sure do. . . when they’re cooked right! I always find it risky to order ribs at a restaurant, even popular BBQ joints. More times than not, they aren’t very good. - Source: Internet
- David usually rubs his just before setting up the grill. However, If you have time, wrap the racks in plastic wrap and let them cure in the refrigerator for at least 4 hours or as long as overnight. Smoking the ribs right away is perfectly fine, but sitting in the fridge for several hours allows the dry rub to penetrate the meat a little more. - Source: Internet
- The rationale behind pre-cooking ribs is to tenderize the meat before it hits the grill. Then the grilling portion of the cooking process is more to add the char and adhere the sauce to the ribs. But is it necessary? If you’re making side ribs, then yes, it’s a very good idea. As mentioned earlier, side ribs tend to be tougher than back ribs and benefit from some low-heat cooking to tenderize the meat. - Source: Internet
- Remove the membrane from the back of the ribs. The membrane is a thin, white looking skin on the back of each rack of ribs. This membrane can block out the flavor, because it creates a barrier against the seasoning. - Source: Internet
- The membrane will toughen as it’s cooked, so it’s better to pull it off the inner side of the ribs beforehand. It can be tough to see, but once you locate it, it is easily pulled off and discarded. (You can always request your butcher do this for you.) - Source: Internet
- You can also crack them to test for doneness. To do this: use a pair of tongs, pick up a slab of ribs, and bounce the ribs slightly. They are ready when the slab bows over until the meat begins to crack on the surface. A small crack typically means you need just a little more time. The ribs should almost break when you lift the slab. - Source: Internet
- Place the grate back on the grill. Fill your aluminum pan with water and place it on the half of the grate directly above the charcoal. The idea is for this to create a constant supply of steam, but do keep an eye on it: If it starts to finish up, you will need to refill it. - Source: Internet
- Knowing the temperature inside your smoker or grill is crucial. Even if your smoker or grill has a temperature gauge, we still highly recommend purchasing a digital BBQ thermometer such as Smoke™ from Thermoworks. Thermoworks thermometers are some of the most accurate thermometers money can buy. This particular model was designed for competition BBQ teams and professional chefs. It has a two-channel alarm that uses probes to read the temperature of the meat and the pit accurately. - Source: Internet
- The first tip when cooking ribs is to always remove the silver skin membrane. Take a sharp knife and lift up the membrane at one end on the backside (or bone side) of the baby backs. If you use a paper towel once you start to pull it up it will come up super easily. You can check out this video from Barbecue Tricks to see the exact way to do it. - Source: Internet
- The key to any good round of ribs is proper preparation. This stage can make or break the success of your meal and neglecting good prep will give you bland, inferior ribs. Simply throwing them as you bought them onto the grill isn’t going to cut it. - Source: Internet
- For these ribs, a gas grill is ideal, since it’ll give you a steady flame and unwavering temperature; however, a charcoal grill with a thermometer will work too. It’ll just be slightly more challenging to maintain the temperature. Though, of course, you’ll get that extra smoky taste that makes ribs so great. - Source: Internet
- David says if you smoke ribs enough, you just kind of know, but it takes some practice. “Smoke the ribs until a dark ‘bark’ (outside crust) forms, the meat starts to draw away from the bone, and the temperature of the smoker has remained constant for about 5 sometimes 6 hours.” - Source: Internet
- Grill the pork back ribs on indirect heat. Turn on the burners to low temperature heat. If you have a large grill, turn on the two outer burners and then set the ribs on the section where there are no flames. If you have a smaller grill, heat one side and leave the other side of the grill off. - Source: Internet
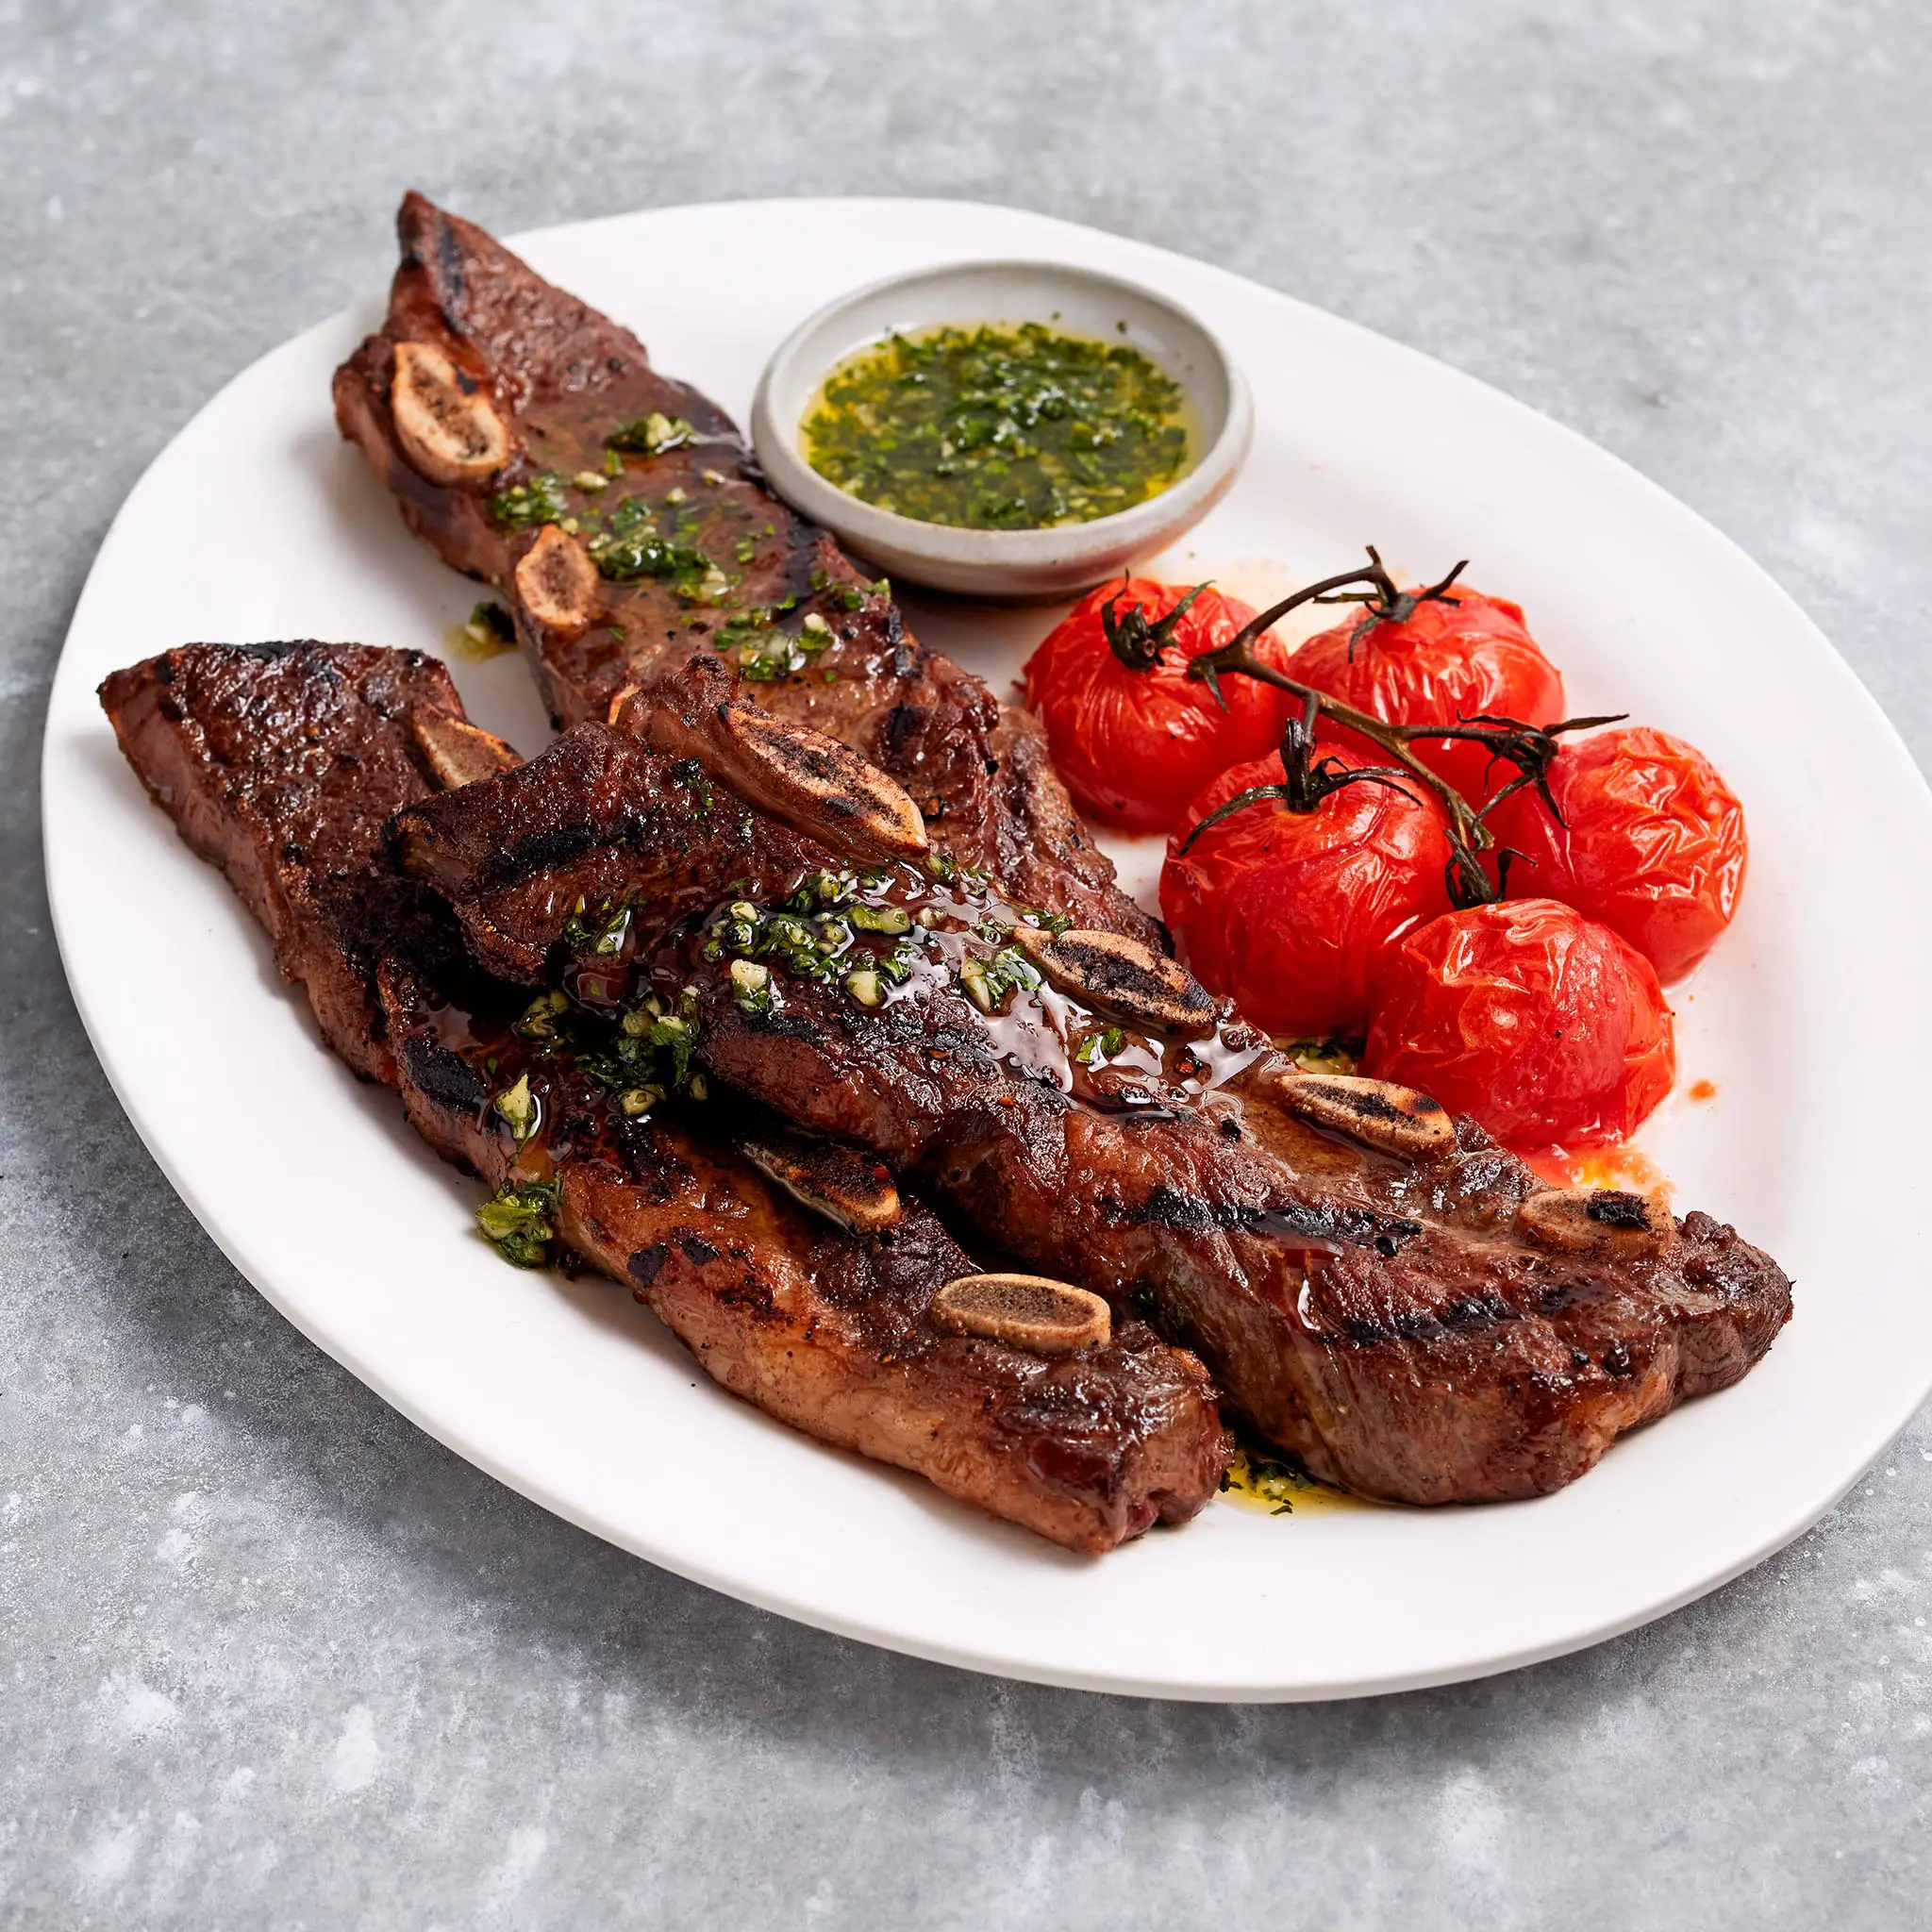
- Grilled low and slow yields Fall off the Bone BBQ Ribs, brush with a tangy bbq sauce for lip-smacking deliciousness. Be forewarned, make a double batch of these bone tender ribs— after making these dozens of times there are never any leftovers. Perfect for grilling season or any time you want easy entertaining! (oven option too) - Source: Internet
- Remember that we are aiming for an internal temperature of 250F/120 C. If it passes that, then open the vents on the roof of your grill to allow some heat to escape. If needed then feel free to keep them open to allow enough ventilation to maintain a consistent temperature. - Source: Internet
- Remove the membranes from the back of each rack of ribs by sliding a butter knife between the membrane and the bone over a center rib, then gripping the membrane with a paper towel and pulling away. Trim any excess fat. Season both sides of the ribs with Traeger Pork & Poultry Rub. Let sit for 10 minutes. - Source: Internet
- Pork Butts and Briskets: You can cook larger cuts of meat that are usually cooked with indirect heat by using the optional 10" lid and flat grate. You’d probably want to build your fire in the one end of the grill and set the meat on the grate opposite the heat source. The optional charcoal pull-out would be handy for adding more fuel throughout the cook as needed. - Source: Internet
- I rest my ribs for 10–15 minutes on a baking sheet loosely covered with tinfoil. They can rest up to an hour like this if needed. Food done too early? Follow the “foil-towel-cooler” rest method! - Source: Internet
- Preheat the grill to about 200 to 250 degrees F max. To maintain this low temperature, begin by lighting only about 10 to 16 pieces of charcoal and set up the grill for an indirect Three-Zone Split-Fire . To do this separate the coals into two equal piles on opposite sides of the grill grate. (see notes) #3 Smoking the ribs When the smoker or grill is the ideal temperature range, you are ready to smoke, place the ribs into the grilling rack over indirect heat; toss a chunk of hickory wood on top of each basket of hot charcoal, and cover the grill. - Source: Internet
- You will find many smoked rib recipes that call for a 3-2-1 method. Where the “2” represents how many hours the ribs should cook in the wrap. Two hours is WAAAAAY too long. Your ribs will turn to mush. Don’t do it! - Source: Internet
- PRO TIP: If you don’t have a thermometer to know when the ribs are done, the best way to tell is to use tongs to lift the ribs. If when you lift them, the bones pull away from the meat you know they are done. (Use a wide spatula type tool to lift them off the grill so they don’t fall lifting them off the heat) - Source: Internet
- You can smoke baby back ribs on whatever grill or smoker you have. For this rib recipe, David uses his Weber Performer kettle-style grill. It’s ideal for grilling and smoking anything you want. It’s easy and simple to use and doesn’t cost a fortune for someone who’s just starting with smoking meat. You’ll be surprised how good ribs on the grill are using charcoal. - Source: Internet
- The accepted finished temperature of pork is 145°F, however, this has not given the collagen inside your ribs time to become gelatin for that perfect bite. That begins to happen when temperatures inside the meat reach 165°F. Continue cooking ribs until they reach around 195°F to 203°F for maximum render. You can keep an eye on this using a meat thermometer between the bones, however, you need to exercise caution as the meat nearest the bones will register as warmer than the meat in the middle. It can be a tough balance with thicker probe thermometers. - Source: Internet
- Consequently, the problem with boiled ribs is that water is a solvent. The water pulls the flavor out, and all flavors are left inside the pot. Believe it or not, boiling the ribs can dry the meat because its proteins contract and squeeze all the moisture out of the muscle fibers. - Source: Internet
- Preheat grill to medium-high. Brush grill grate with oil. Brush barbecue sauce on both sides of roasted ribs. - Source: Internet
- Alternative to grilling them ribs can be made in the oven. Bake at 275°-300° for 3- 3 1/2 hours. Lemon Blossoms also has an excellent recipe for BBQ Ribs in the Oven with Bourbon Peach BBQ Sauce - Source: Internet
- Surprisingly, many folks think they must boil their ribs before smoking them. The concept of boiling ribs comes from Eastern Europe. Their ribs simmer in water with cabbage, potatoes, carrots, and caraway seed to make a pork stew. - Source: Internet
- Check the temperature of the grill every hour, staying as close to 225 degrees F as possible. It’s important to resist the temptation to open the lid. Only open the lid of the grill if you need to add more charcoal and wood to maintain temperature and smoke. - Source: Internet
- To remove the membrane, lay the ribs on a flat surface, curve side up so that the curve of the ribs points up at you. Using a sharp knife, peel the membrane from one corner near the bone. Pull across the rack with firm, steady pressure. If it tears, pull it up and continue where it tore off. Rinse and pat the ribs dry again. - Source: Internet
- “Perfectly smoked baby back ribs are achieved when the ribs are cooked to the precise consistency; where you render the fat. The ribs should stay firm and in one piece, until you break them, leaving just a little meat for gnawing off the bone. It’s really all about time and temperature. They’ll make you have sauce on your face, slam up to your eyebrows!” - Source: Internet
- All pork ribs have a tough membrane on the backside. This needs to be removed because your salt and rub won’t penetrate it. Also, it doesn’t make for fun eating when your teeth can’t bite through it very well. - Source: Internet
- The most reliable way to check ribs for doneness is by using an instant-read thermometer. Stick the thermometer into the center of the meat, making sure to avoid touching any bone. Ribs are technically safe to eat at 145 degrees, but it’s best to cook most cuts of ribs until somewhere between 180 and 195 degrees when you’re cooking them low and slow. If you’re cooking short ribs, however, it’s best to grill them at a higher heat and take them off the grill once they reach approximately 145 degrees. - Source: Internet
- Clean and preheat your grill on low heat, establishing an area with indirect heat and greasing the grates. Remove the ribs from the marinade and add them to the grill over indirect heat. Cover the grill and cook, rotating once or twice, until the meat is tender and the internal temperature reaches somewhere between 180 and 195 degrees. Depending on the size of your ribs, this could take 2-3 hours. Let rest for at least 10 minutes before separating and eating. - Source: Internet
- Our main aim here is to turn our grill into a smoker. This actually takes a bit of skill because we need to keep a good, constant heat of about 250F/120 C. Not only will this require the use of a good meat thermometer, but also a little knowledge of indirect cooking. - Source: Internet
- Also known as baby-backs, these are the most popular ribs on the grill these days. These ribs run from the spine, and along the back of the loin section. They are tender, with smallish bones and tend to have a good proportion of meat. They’re the priciest of the ribs on the market for these reasons. - Source: Internet
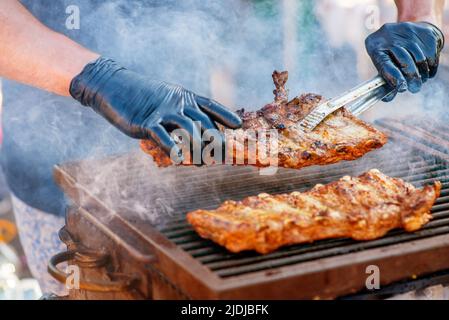
- Use a grilling brush or mop to slather the meat side of the ribs with sauce. Close the lid and let the sauce cook onto the meat for about 15 minutes. Then flip the racks over and brush sauce onto the back of the ribs. - Source: Internet
- This Fall off the Bone BBQ Ribs Recipe will amaze you at how simple and how little time it will actually take you to make them. Seasoned with just a few ingredients (a dry rib rub below or try this homemade Cajun Seasoning Recipe for a little kick.) These grilled baby back pork ribs work with or without barbecue sauce! - Source: Internet
- When the ribs are approaching done, apply your BBQ sauce. Be careful here: as tempting as it might be to thickly paste on the sauce, I strongly recommend spreading it in thin layers. Doing this will give us the satisfying and sticky surface of our ribs. - Source: Internet
- Lastly, take a second sheet of tinfoil, the same size as the first, and lay it over top of the first sheet that is holding your ribs and juice. Then, continue making multiple folds on all four sides to create a tight seal. Take these folds right up to the edges of your ribs, being careful to not to let a rib bone puncture the foil. - Source: Internet
- Personally, I prefer spare. They’re cut from the belly-end of the ribs, so are much meatier. Baby back are a little shorter but still an excellent choice. Cooking time tends to be about 4-5 hours for spare and 3-4 for baby back. - Source: Internet
- If you are using a commercial rib rub, it likely has a lot of salt in it. If that is the case, DO NOT dry brine or salt the ribs separately. Just go directly to rubbing your ribs. - Source: Internet
- Arrange the ribs on the grate meat side up and immediately close the lid. You don’t want to give the fire too much air. Check on them every 15-20 minutes to make sure the bottom sides are not charring too much. - Source: Internet
- Why should you cook your ribs past done? The long and short(rib) of it is that it provides the collagen and fat in the ribs to melt and render giving you a tastier and more tender outcome. How do you know they’re ready? The best way is to use a BBQ Thermometer to ensure you reach the perfect internal temperature of between 195°F and 203°F. The other tests are open to interpretation and take practice to perfect. How do you make sure your ribs are perfectly done? Share your secret technique, favorite rib recipe, or just your success stories on our social pages like Facebook and Instagram, using the hashtags #BBQRibs and #NapoleonGrills. - Source: Internet
- For this BBQ Ribs recipe, you’ll use 2 racks of Pork Spare Ribs (St Louis Style). I think these are the best ribs for entertaining because they’ve been trimmed to a uniform size and are just easier to handle. But for the full rundown on buying pork ribs consult Bon Appetit’s awesome pork-rib buying guide. - Source: Internet
- Few foods are better than perfectly tender ribs, glistening with caramelized BBQ sauce. Now, you can have smokehouse-quality ribs from the comfort of your own home. All it takes is a grill, a few hours, and—okay—a lot of patience. While they’re cooking is the perfect time to get the rest of your sides ready. We’re talking BBQ classics like coleslaw, potato salad, and cornbread. - Source: Internet
- Two: trim any major fat pockets on the top side of your ribs. Don’t try to get all this off, but rather simply reduce the thickness of any fat pockets you find. Remember, the fat will render off pretty well during the cook process. - Source: Internet
- Despite the name, baby back ribs do not come from baby pigs. Baby back ribs come from a part of the rib connected to the backbone. This is part of the loin muscle that runs along the back on both sides of the pig’s spine. Whereas the spare ribs come from the belly. - Source: Internet
- Layer carefully by applying a thin layer on one side, before turning over and doing the other side. Once both sides are coated, close the lid on your grill and leave for 5 minutes before repeating the process again. Repeat 4-5 times in total. Once done, remove from heat and put to one side. - Source: Internet
- Times are never exact. As the popular saying goes: they’re done when they’re done. Don’t worry! I explain how you can tell when ribs are done later in the post. - Source: Internet
- Place the wrapped ribs back on the grill. Check on the coals and water again. Don’t add more wood chunks this time as the ribs will have absorbed enough smoke. - Source: Internet
- Grill ribs 15 minutes total, turning over and slathering with sauce at least twice so that the ribs become well-glazed and nicely charred. Remove ribs from grill and tent with foil 5 minutes. To cut, hold racks upright on a cutting board and slice between ribs; serve with remaining sauce. - Source: Internet
- You’ll set your charcoal only on one side and let them get super hot, then allow them to get to medium/ low heat before placing the ribs on the non-heated side. Because it takes 2-3 hours to grill the ribs, you may need to add some coals to the bbq. You’ll need to pay special attention that the grill does not get too hot. - Source: Internet
- Remove the membrane from the back of the ribs. The membrane is a thin, white-looking skin on the back of each rack of ribs. This membrane can block out the flavor by creating a barrier against the seasoning. - Source: Internet
- Combine 2 Tbsp. salt, 2 Tbsp. pepper, chili powder, cumin, paprika, oregano, and thyme. Apply rub to ribs; cover with foil. - Source: Internet
- The best way to get the most flavor from oven-baked ribs is to use a spice rub. I love this rub because it’s made with many common spices you probably already have in your pantry like cumin, smoked paprika, and ground coriander. When mixed with the brown sugar the flavor created is sweet and smokey with a little bit of a kick. - Source: Internet
- To remove the membrane, lay the ribs onto a flat surface so that the curve of the ribs point up at you. Using a sharp knife, peel the membrane from one corner near the bone. Pull across the rack with firm steady pressure. If it tears, just pull up and continue where it tore off. Rinse and pat the ribs dry again. - Source: Internet
- First, let’s talk smokers. Regardless of the type of smoker you have, this recipe will work for you. If you don’t have smoker, you can make these babies on a standard charcoal grill. Just make sure to follow my instructions on How to Smoke on a Charcoal Grill. - Source: Internet
- The goal temperature of smoked baby back ribs is an internal temperature of 190 degrees F. Use an instant-read thermometer, such as the Thermapen by Thermoworkst, to take the temperature of the ribs. Be careful not to take the reading from the bone. - Source: Internet
- Bring the temperature up to 250 degrees F, using the vents on the grill to regulate the temperature. The vents control the amount of oxygen getting to the fire. So less air means less fire. - Source: Internet
- Fire the grill with 20 pounds of charcoal briquettes (bottom vents and lid open). Mound the charcoal in the center and light half of the coals with a propane torch. Use a garden hoe or shovel to mix the coals and spread them evenly. Toss in several chunks of smoking wood. - Source: Internet
- I grew up on country-style ribs. Country-style ribs are actually the same thing as a bone-in rib roast, however they are sliced through the ribs and butterflied. Therefore they have a high proportion of “white” meat. They are great grilled, but also stand up well to slow-cooking or braising. - Source: Internet
- Estimate 1 tablespoon per pound of ribs. My ribs below are about 3.5 pounds each, so I put on 3.5 tablespoons of rub to each rack. - Source: Internet
- Preheat the grill to about 200 to 250 degrees F max. To maintain this low temperature, begin by lighting only about 10 to 16 pieces of charcoal and set it up for an indirect Three-Zone Split-Fire. To do this, separate the coals into two equal piles on opposite sides of the grill grate. - Source: Internet
- Grilled ribs are a staple of American barbecue, and for good reason; when cooked properly, they’re fall-off-the-bone tender with deep, meaty flavor. There are pitmasters worldwide who are committed to perfecting their rib-grilling technique, but that doesn’t mean you have to leave it to the professionals. Keep reading to learn all about the most popular rib cuts—pork and beef alike—and how to cook ribs confidently at home. - Source: Internet
- You will need to add fresh coals and possibly more wood chunks to each side of the grill every hour for at least the first 3 hours. #4 Low and slow Check the temperature of the grill every hour, staying as close to 250 degrees F as possible. It’s important to resist the temptation to open the lid. Only open the lid of the grill if you need to add more charcoal and wood to maintain temperature and smoke. - Source: Internet
- David makes his own sauce over a gas burner on the stove. It is warm and ready to apply to the ribs. If you use a bottled sauce, you want to warm it up and cook it without burning it. Many sauces, including David’s, benefit from baking onto the meat; they may even add extra depth by caramelizing. - Source: Internet
- Once the charcoal is lit, place it at the bottom of your grill and position it so that it is only covering half of the grill area. Add several large hardwood chunks to the charcoal. This will help us generate smoke throughout the cooking process. - Source: Internet
- Three: I like to square up my ribs. I trim off the last one or two ribs from the small bone end to make them a bit more uniform. This is more common with St. Louis spare ribs than baby backs. This is optional and more about aesthetics than anything else. - Source: Internet
- The two most popular cuts of beef ribs are back ribs and short ribs. As the name suggests, back ribs come from just beneath the backbone, and refer to the meat remaining once the prime rib and ribeye have been removed. While there isn’t a lot of meat on the back ribs, the meat is high-quality and succulent. Short ribs are cut from the chuck area, and are nicely marbled, which gives them rich flavor. Although they’re most commonly braised, short ribs are also excellent on the grill. - Source: Internet
- If this proves too difficult, then you can adopt a more sight-based approach. Lift the ribs in the middle. Pay attention to the ends of the bones. If they droop loosely down, then they are done. - Source: Internet
- Another hour later, check on the ribs. We want them to curve slightly without breaking. If they’re yet to reach this point, allow them to cook for a little longer. However, if they are bending nicely then double wrap the ribs in aluminum foil. We do this to help increase the internal temperature of the meat while also holding in moisture, making them extra juicy. - Source: Internet
- After it is rubbed down, put it back into the fridge until it’s time to smoke. We want the ribs cold when they go on the smoker. Colder meats take longer to cook, which allows for more smoke absorption. - Source: Internet
- Before pouring this wrap juice to the tinfoil, microwave it just long enough to warm it up. We don’t want to put cold liquids in with the hot ribs. Once warmed, pour a ½ cup of this mixture into the well created in your tinfoil sheet. - Source: Internet
- Properly smoked ribs are done when they reach a temperature of around 200 ºF. But let me warn you: it is very difficult to take this temperature accurately due to how close the bones are to each other. The best way to know when ribs are done is to use the bend test. - Source: Internet
- It’s also important to bear in mind that your grill will dictate the size of the rack that you can cook at once. We want as much of the ribs to be exposed at once, so it’s not a good idea to pile them on top of each other. As a result, you will probably only be able to fit one rack of spareribs on the grill or two racks of baby back. Keep this in mind when preparing your ribs. - Source: Internet
- Start by turning the ribs over to sauce the bone side first, using a basting brush to apply the sauce. Then flip them over again and sauce the top side. Close the grill and allow the sauce to set for at least 15 minutes before performing another bend test and/or saucing again. If you do sauce again, only apply sauce to the top of the ribs. - Source: Internet
- The temperature of the kettle needs to be around 250 degrees F. This is done by controlling the top and bottom vents of the grill to restrict the flow of oxygen. To start out, move the bottom vent, so it is half closed and close the top vent almost all of the way. - Source: Internet
- With this approach, we’re going to be a bit creative and call on the help of a disposable aluminum pan. We’re going to fill it with water and use it to add moisture to our grilling environment, in turn helping to regulate the temperature. More on this in a moment. - Source: Internet
- As you already know from many of my Science of Barbecue articles smoking meat is a technique that slowly melts fat and relaxes the collagen in meat allowing water into the muscle fibers creating gelatin. This process is called rendering and it is the main reason why you should cook your ribs past their “done” temperature. If you are cooking pork ribs past the temperature of doneness, how do you know when the ribs are ready? - Source: Internet
- At the end of these six steps if you break into a rack of ribs and notice a thin pink layer just beneath the surface of the meat. Congratulations! That is the highly prized smoke ring. It’s kind of like a pink halo around the meat; a sign of mouthwatering, succulent and flavorful smoked baby back ribs! - Source: Internet
- It’s also a good idea to prepare the BBQ sauce ahead of time so it’s all ready to go once you head out to the grill. This can even be done up to two days before. If you have a large crowd you can make extra BBQ sauce and serve the ribs along with my BBQ Chicken Sliders. - Source: Internet
- “Hot and Fast” Ribs Recipe Here are the steps I used to cook these ribs on my BBQ42 Charcoal Grill. I’m cooking 6 racks of baby back ribs. They should take a total of 2 to 2-1/2 hours to cook. - Source: Internet
- What About the Smoke Flavor? Ribs cooked using this method will have a delicious char-grilled flavor, but less smoke flavor than you might want. I found that some of the ribs got very dark on the bottom side, but the meat remained tender and delicious. If you are worried about them lacking a distinct smoke flavor, you could use one of these methods: - Source: Internet
- Place the ribs, bone side up, on a chopping board. Using a pair of tongs and a long sharp knife, slide the knife between the bones evenly. This should give you an even and uniform cut from the track. - Source: Internet
- At the end of these six steps if you break into a rack of ribs and notice a thin pink layer just beneath the surface of the meat. Congratulations! That is the highly prized smoke ring. It’s kind of like a pink halo around the meat, a sign of mouthwatering, succulent, and flavorful smoked baby back ribs! - Source: Internet
- Note on rinsing: don’t hold the ribs under a running faucet. This will splatter raw meat all over your kitchen. Instead, add cold water to a large measuring cup or pitcher and gently pour over the ribs into your sink. - Source: Internet
- When shopping for ribs, you first need to decide whether you’re opting for pork or beef. Pork ribs are smaller, and beef ribs are bigger, which translates to different cooking times. Beef ribs are also fattier than pork ribs, which yields an intense, beefy flavor when the fat renders. Since pork ribs have a lower fat content, the flavor is milder, so if you want to highlight a punchy marinade, it’s best to go with pork. Lastly, pork ribs are considerably less expensive and easier to source than beef ribs. - Source: Internet
- Time for the home straight. About an hour after you have put the ribs in aluminum foil, remove them from the foil and place back on the grill. Cook for a further 30-60 minutes. This final round of cooking is so that we can dry the surface of the ribs slightly to help add some beautiful texture. - Source: Internet
 Following are some suggestions on where to begin your search for data on how long to cook ribs on a grill:
You should try to find How To Grill Ribs On Gas Grill-related information from reputable places. Libraries, online resources, and even paid journalists all fall under this category.
Following are some suggestions on where to begin your search for data on how long to cook ribs on a grill:
You should try to find How To Grill Ribs On Gas Grill-related information from reputable places. Libraries, online resources, and even paid journalists all fall under this category.It’s crucial to be aware of the many electronic media sources available when researching BBQ Ribs in the Oven then Grill Recipe, such as Google and YouTube. You may also get info about Grilling Ribs Fast And Hot on social media sites like Facebook and Twitter.
Video | How To Cook Ribs On A Grill
It’s crucial to read to examine the authenticity of each source in order to acquire the greatest information regarding “Hot and Fast” Pork Ribs Recipe on My BBQ42 Charcoal Grill. You’ll learn more about Bbq Ribs Recipe after watching the films included in this post, which come from a variety of different sources. Information on a wide range of topics may be easily accessed via the internet.
## Notable features of Quick Fall Off The Bone Ribs Grill include:- How To Cook Ribs On A Grill
- How To Cook Ribs On A Grill With Charcoal
- How To Cook Ribs On A Grill Fast
- How To Make Ribs On A Grill
- How To Prepare Ribs On A Grill
Because there are so many websites and forums that provide information about how to cook ribs on a gas grill with foil, it should not be difficult for you to locate the data that you want.
The majority of individuals are accustomed to taking a completely different approach when it comes to obtaining information regarding how to cook ribs on a grill. This makes it possible to take a more in-depth look at the information that is available about Fall Off The Bone Ribs Grill and how it might be utilized.
methods for producing information displays about Fall Off The Bone Ribs Grill that are both aesthetically pleasing and functional. In commercial and marketing settings, as well as for the purpose of conveying information on how long to cook ribs on a grill, they are useful tools to have. Because of this, we also supply some photographs relating to How To Cook Ribs On Charcoal Grill In Foil.
In summing up, I’d like to say that this article offers a general summary of Fall off the Bone BBQ Ribs Recipe. Also covered are Ribs Hot And Fast and Fall Off The Bone Ribs Grill, which serve as a benchmark for evaluating the depth of your understanding of Fall Off The Bone Ribs Grill.
