Today’s topic is How To Clean The Grates On A Gas Grill. Obviously, you can find a great deal of How To Clean A Grill Or Smoker Properly-related content online. The proliferation of online platforms has streamlined our access to information.
There is a connection between the cleaning the grates on a gas grill and Grill Seasoning Oil information. more searching has to be done for Grill Seasoning Oil, which will also be related to how to clean the grates on a gas grill.
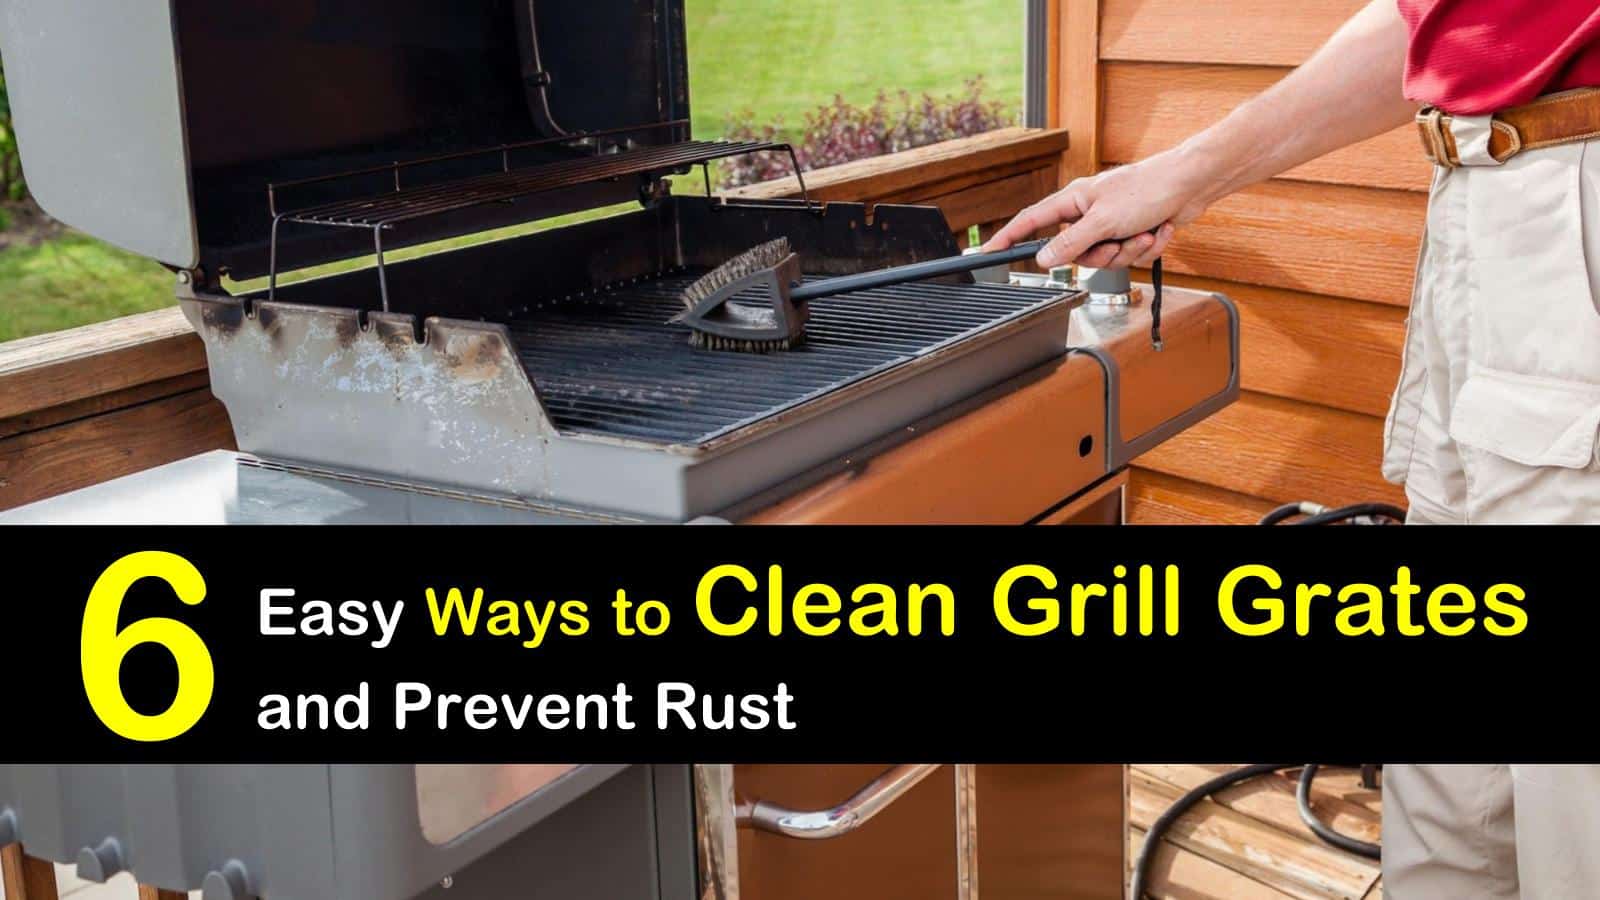
80 Shocking Facts About How To Clean The Grates On A Gas Grill | Grill Seasoning Oil
- In a post last year, I said I was a clean freak when it comes to my grill. But sometimes I get busy and/or lazy and I let my Weber Summit 450 go too long between cleanings. I know it’s starting to get bad when I have a hard time lighting the grill because the ignitors are clogged with debris. I know it’s getting even worse when the burners are burning unevenly and with yellow flames because some of the burner holes are clogged. That’s when I know it’s time to break down and do a deep cleaning of my grill. - Source: Internet
- Mix two cups vinegar and one cup water together and pour into a large garbage bag. Put the grates in the garbage bag with the mixture and secure with a tie or rubber band. Allow the grates to soak overnight. Remove the grates the next day and rinse off with water. Lightly scrub off any remaining food debris that isn’t washed off. - Source: Internet
- If you are using charcoal and/or wood as your fuel source, just let the coals burn out and carbonize the food residue. Then, use one of the methods we covered above to clean your grill grates. If you are using a pellet cooker or gas grill, leave the heat going for a little bit after you are done cooking and clean those grates off. Just make sure you don’t forget to turn the cooker all the way off when you are done. - Source: Internet
- The best way to deep clean your grill is to work from the top to the bottom. Focus on every part of the grill and just utilize a clean, heavy-duty stainless steel wire brush. This will scrub off the carbon buildup throughout the grill. Remove components individually that can be removed and scrub them with the brush outside of the cooker. This will help ensure each part is thoroughly cleaned. - Source: Internet
- Steam clean the hot grates: Using a bucket of water and a good-quality wire brush , you can create steam to help clean and scrub the grates. Dip the brush in water and scrub the hot grates with the wet brush. Then, use a paper towel to remove any remaining food bits and ensure there are no loose wire bristles on the grates. - Source: Internet
- Green recommends letting it heat up for 15 minutes; any food debris will turn to ash, making it easy to remove with a grill brush. Brush the grates. Use a wire brush to remove anything still clinging to the grates, leaving behind a nice, clean cooking surface. When choosing a brush, Green recommends “a handle long enough to keep your hands, arms, and clothing away from the open flame and heat of the grill.” - Source: Internet
- Getting stainless steel grates super hot helps melt away food pieces and grease. You can try covering them with aluminum foil during this process to concentrate the heat. Cast iron. Like your favorite cast-iron skillet, cast-iron grates need to stay clean, dry, and seasoned with oil to keep them from rusting. - Source: Internet
- Remove the propane tank. Ensure that the gas is in the off position and remove the gas tank from the grill. - Source: Internet
- Clean the exterior. Use grill cleaner or soapy water to clean the exterior of the grill and side tables. If you have any persistent grease stains, dust them with baking soda and use a damp cloth to scrub away. - Source: Internet
- Once you have done a deep clean of your grill, being proactive about keeping your grill clean will make things much easier and your cooking more successful. One of the easiest ways to do this is to do a quick clean of your grill grates after each cook while the grates are still hot. This will keep grease and carbon from building up on those grates. - Source: Internet
- If you really want to elevate your cooking game on your freshly cleaned grill, get the inside scoop straight from the pros in the online outdoor cooking classes here at BBQ Champs Academy. Champion Grillmasters and Pitmasters will walk you through step-by-step how to cook like a pro like never before. To get the full inside look, check out the All-Access pass now! - Source: Internet
- If you’re using a charcoal grill, check before preheating. If full, empty the ashes into a metal container or piece of aluminum foil, wrap them up, and throw in the trash. Preheat the grill. Green recommends letting it heat up for 15 minutes; any food debris will turn to ash, making it easy to remove with a grill brush. - Source: Internet
- Brush the grill grates. Remove the grates from the grill and use a grill brush to clean both sides thoroughly. For a deeper clean, wipe with warm, soapy water. - Source: Internet
- Like your favorite cast-iron skillet, cast-iron grates need to stay clean, dry, and seasoned with oil to keep them from rusting. Porcelain coated. The coating can chip off and lead to rust, so err on the gentle side when brushing or scrubbing, and avoid materials like steel wool and metal scrapers. Also, Weber notes that you shouldn’t use any dish soap or cleaners containing citrus, as it can also corrode coated grates. - Source: Internet
- Glossy porcelain-enameled grill grates are susceptible to chipping. A chipping finish poses a health risk if any porcelain chips end up in your food. It also creates an uneven cooking surface that will make it harder to grill and opens up an entry point for moisture, increasing the likelihood of rust. If you notice your grate’s finish is significantly chipped, it’s time to replace your grill grate. - Source: Internet
- Use a narrow putty knife to scrape the sides and bottom of the lower firebox below the burner tubes. Push the debris into the tray in the bottom of the grill. Use a compressed air duster to remove debris from any hard-to-reach spots. - Source: Internet
- From our last test of 23 grill cleaners, we found several of the top performers here. Our list was compiled based on the product’s ability to clean burnt-on layers of barbeque sauce (counting the exact number of swipes necessary to clean the grill); we also rated how long it took to clean and how well the grill was cleaned. We made note of how easy each product was to apply and how simple the directions were to follow, and we reviewed the safety information on the label. Throughout the year, we continue to test grill cleaners both in the lab and at home to update the picks on this list as new products are available to purchase. These are the grill cleaners we recommend to clean your grill and remove grease, charred-on food and sticky sauces quickly and easily. - Source: Internet
- Get the grill as hot as possible (if it is a gas grill turn all of the burners on high) and close the lid. Leave the lid closed for about 15 minutes. If the grill hasn’t been cleaned in a while you may have some smoke but most of this will be grease smoke. This should burn off after about 15 minutes. - Source: Internet
- As we have touched on in previous articles, preparation is key when it comes to successful outdoor cooking. A huge part of that is making sure your grill or smoker is clean and stays that way in between uses. To get the best flavors in your grilled foods, it is essential to start with a clean cooker and grates. But, you may be wondering, how to clean a grill or smoker properly and what you can do to keep it clean. - Source: Internet
- A tidy grill is one of the keys to grill-out success. Dustin Green, the Director and Culinary Grill Master of Weber’s Grill Academy, explains that regular grill maintenance “prevents low temperatures, uneven heat, and food sticking to the grates, which are all possible side effects of poor grill cleaning and conditioning.” - Source: Internet
- Keep it covered. Green notes “a tight-fitting grill cover will help protect your grill from moisture” and keep it cleaner in between uses. If possible, store the grill in a covered space like a garage or shed when not in use. - Source: Internet
- Use a grill brush or wad of aluminum foil to remove any flaking material inside the grill lid. These flakes are carbonized grease that builds up during grill and eventually flakes off. It is not rust, paint or the porcelain enamel finish coming off. - Source: Internet
- Reassemble. Replace any removed parts, such as the charcoal grate or grill grate. - Source: Internet
- “The gunk that collects on your grates is mostly grease and it becomes combustible at high temperatures. You’re risking lots of smoke and maybe fire,” he says. At the very least, he notes, the oven will be left a mess, and there could be permanent staining from all the soot. - Source: Internet
- Clean the interior. Use a plastic scraper and the grill brush to clean the sides and lid of the interior of the grill. Steel wool or balled up aluminum foil works well for stubborn build-up on the interior or the grates, and soapy water can be used as needed. - Source: Internet
- After burning off excess, brush the grills with the steel brush to remove the carbon. Turn off gas, disconnect and remove propane tank. Let cool completely. - Source: Internet
- Experts seem to agree that your grill only needs to be deep cleaned 1-2 times per year, but I’d say that with regular year-round grilling it should be done every few months. Veggies fall through the grates, chunky marinades splatter, and grease from your burgers and steaks build up rather quickly. You can often use the eye test and tell when it needs to happen. You’ll see how dirty my own grill was with about 9 months between cleanings; it should have been done quite a bit sooner. If nothing else, do it before before and after the high holy summer grilling season. - Source: Internet
- If you’re cooking with a gas grill, check before preheating — if it’s full, empty it before proceeding. Check the ash catcher. If you’re using a charcoal grill, check before preheating. If full, empty the ashes into a metal container or piece of aluminum foil, wrap them up, and throw in the trash. - Source: Internet
- Even if the BBQ is made of stainless steel, keep in mind that you should not use metal brushes and steel cleaners. They are very harsh, and they will not allow you to clean your machine successfully. Instead, when used, you will end up with scratches that will negatively affect the way your grill looks. - Source: Internet
- Clean the lid. Use a grill brush or plastic scraper to clean off any black flakes or debris from the underside of the lid. For a good scrub, dip the brush in warm, soapy water before each use. - Source: Internet
- Wash the bottom tray, drip pan and bracket in hot, soapy water. Dry the parts thoroughly. Reassemble the pan and bracket with the tray, install a new foil drip pan liner, and reinstall the tray under the grill. - Source: Internet
- You should periodically deep clean your grill grates as well. Remove the grates and use hot water, mild dish detergent, and a brush or stainless steel scrubby to thoroughly clean both sides. Soaking the grates for a little while in a large tub of hot water with the detergent will make the scrubbing even easier. - Source: Internet
- Brush the grill grates. Remove the grates and give them a thorough cleaning with a grill brush on both sides. If necessary, scrub with warm, soapy water. - Source: Internet
- While the grates are warm, brush them with a bristle brush or a ball of tin foil held between tongs. Scrub away any light rust or stubborn stuck-on bits using steel wool. If these spots still won’t lift, you can use a solution of water and mild dish soap. Once the grates have been brushed, rub them with a thin layer of vegetable oil and heat the grill for a few minutes. This will bake the oil into the cast iron and create a thin, non-stick coating for your next cookout. - Source: Internet
- If your grill has plastic work surfaces, clean them with Simple Green or Purple Power. If stained, try using a scrubber sponge with these cleaners or a Mr. Clean Magic Eraser. Use ArmorAll protectant to give the surface a shiny, like-new appearance. - Source: Internet
- Cast iron grill grates are very durable and known to generate the most even cooking surface. If your cooktop has too much of an imbalance in temperature, you end up with food that is cooked unevenly, which can undermine your dish as well as your health. Similar to cast iron cookware, cast iron grates require a lot of upkeep and should not be exposed to a lot of moisture. - Source: Internet
- After you’re done cooking, cleaning your grill grates will help reduce any rust buildup and ensure the longevity of your grill. You should plan on scraping your grill grates after every cook and do a deep clean at least once a year. Follow these tips and learn how to clean your grill grates properly. - Source: Internet
- Empty the ashes. Remove the ash catcher and empty the ashes into a metal can or a piece of aluminum foil. Discard in the trash. If needed, use the grill brush to clean the catcher. - Source: Internet
- A block of hardwood: You can easily make your own effective grate scraper by using a hand-sized block of oak or other hardwood. Again, make sure you have a heat-proof glove for this one and then rub the wood block on the hot grill grates. After a few uses, grooves will be worn into the wood that will fit the grates perfectly. - Source: Internet
- Use a stainless steel wire brush to remove debris from the burner tubes and the Crossover tubes. Force the brush bristles into the holes to clear them. Pay special attention to the holes leading from the ignitor box to the top of the burner and the holes leading from the top of the burner to the Crossover tube. It’s difficult to light the grill and the secondary burners when these holes are clogged. - Source: Internet
- There are some tried and true ways to clean a grill that will help you get your grill clean now and clean it in between cooks. It is recommended that avid cookers deep clean their whole grill or smoker every 2-3 months. More casual cookers should do a deep clean at the end of each grilling season. Then, once you’ve deep cleaned, you can clean more easily in between cooking sessions. - Source: Internet
- For charcoal grills, you want to at least lightly wipe down the grill after every use. However, you need to clean the grate well after every use. The reason for this is because you do not want the burnt remains of your previous grilling session to get on your new grilled masterpiece. A good tool to help you clean the grate is a wired brush. The wired brush scrubs the burnt remnants off a lot easier. - Source: Internet
- Stainless steel grill grates generally tolerate high heats and are mostly rust-resistant but can still be prone to rusting if they aren’t completely dry after use. To clean stainless steel grates, line with a layer of heavy-duty aluminum foil and allow to set over high heat for 10 to 15 minutes. This will concentrate the heat and burn off any remaining food on your grates. Once cool, scrub the grates with a grill-safe brush. - Source: Internet
- Use a wire brush to remove anything still clinging to the grates, leaving behind a nice, clean cooking surface. When choosing a brush, Green recommends “a handle long enough to keep your hands, arms, and clothing away from the open flame and heat of the grill.” Oil the grates. Fold up a paper towel into a tight rectangle, saturate with oil, and use a pair of metal tongs to wipe the oil all over the grates. - Source: Internet
- Your barbecue’s cooking grates are one of the most important parts of your grill. Properly cleaning and caring for your grill grates after each use can help significantly extend the lifetime of your grill, but if you spot major rust, chips, or your grates just won’t come clean, it’s time to replace them. Replacing your grill grates is easy to do—simply remove the old ones and drop in the new ones. - Source: Internet
- If you are using a metal bristle brush, make sure to wipe the grates with a damp paper towel or cloth to pick up any loose bristles. Some people even rub half a lemon or onion over the grates after brushing to eliminate any bristles. Look the grates over one last time before cooking just to be extra careful. - Source: Internet
- Stainless steel. Getting stainless steel grates super hot helps melt away food pieces and grease. You can try covering them with aluminum foil during this process to concentrate the heat. - Source: Internet
- If there is a lot of build-up on the grills, turn on the gas, cover the grill and burn off the build-up. You can let it go on high heat for 20-30 minutes. While you are waiting for this, gather all your tools, including wire brush, gloves (optional), liquid dish soap, a five gallon bucket, cotton rags, and newspaper. A bottle brush is also helpful. - Source: Internet
- This includes the grills, flavorizer bars, removable knobs, grease pan, warming racks, etc. Even the burner tubes can be removed which will allow for easy access and cleaning of the interior. I like to place old newspapers on the ground where I will place the parts for protection and easy clean-up. - Source: Internet
- Metal bristle brushes are a very effective tool to use when it comes to cleaning a grill or smoker, but you have to be very careful. Especially with cheaper brass bristle brushes. Sometimes, the bristles can become loose, fall out, and stick to the grill grates. This is the last thing you or anyone you are cooking for want to end up ingesting. That can quickly turn into a bad situation. - Source: Internet
- Reassemble. Carefully put the grill back together (consult the manual if needed) and reattach the gas tank. - Source: Internet
- When the grill has cooled sufficiently, use a wide putty knife to scrape both sides of each Flavorizer bar into the open grill. Examine the condition of each bar. It’s common for Flavorizer bars to rust due to food drippings and high heat. They do not need to be replaced until they start to rust through and break apart. Set the Flavorizer bars aside after scraping. - Source: Internet
- Scrape the interior. Use a plastic scraper and the grill brush to clean any build-up on the sides and bottom of the inside of the grill, using soapy water as needed. Once the inside of the grill is clean, push all of the debris into the grease tray. - Source: Internet
- Grill grates can be made of many materials. The most common are stainless steel, porcelain-coated steel, and porcelain-coated cast iron. A porcelain enamel coating on grill grates protects the underlying steel or cast iron from rust and decay. In the case of cast iron grates, most manufacturers now use a matte porcelain coating, whereas in the past a glossy enamel finish was more common. Rarely will you find raw or uncoated cast iron grates being sold with a gas grill. - Source: Internet
- Make sure that the sides and lids are also washed. With the use of a towel and cleaning solution or a damped cloth, wipe the side steels and see to it that no particles are left. Do this every time after grilling is done. The longer you ignore t the dirt, the harder it will be to have it removed. - Source: Internet
- The burner control knobs and panel on your grill may vary from the one shown here, but the cleaning process is the same. Remove the knobs by pulling them away from the control panel. Clean the knobs and the panel using Windex or Simple Green, then replace the knobs. - Source: Internet
- Glossy porcelain-enameled grill grates are easy to clean, but require a bit of extra caution. The porcelain surface can easily be compromised by a vigorous cleaning, increasing the potential for chips and rust that will significantly shorten the lifespan of your grill grate. Follow these steps to clean porcelain grill grates: - Source: Internet
- Clean the burner covers and tubes. Gas grills tend to have heat tents (sometimes called bars or emitters) that sit on top of the burner tubes to help cut down on flare-ups. Remove and clean them using the grill brush or a plastic scraper. Use a grill brush to carefully wipe the burner tubes, brushing in the direction of the portholes to avoid clogging them. - Source: Internet
- The shape and size of the bottom tray varies by grill model. Some are narrow and porcelain enamel coated like the one shown here. Some are made of stainless steel. On older grills like Genesis 1000, the bottom tray serves as the entire bottom of the grill box. The point is that your bottom tray may look quite different from the one shown here. - Source: Internet
- Apply a light coating of vegetable oil to the grill racks. Reconnect your gas tank, fire up the grill and let burn for 15 minutes to ensure that everything is well-connected and the grates are seasoned. During these 15 minutes, clean up your work area. - Source: Internet
- Remove the bottom tray from the grill. Use a putty knife to scrape the tray contents into a garbage bag, then use paper towels to remove any leftover grease. Remove and discard the foil drip pan liner and use paper towels to remove any liquid grease that made its way past the liner. Remove any bracket that holds the drip pan and wipe with paper towels to remove major debris and grease. - Source: Internet
- Make sure to rinse the grates off well and dry them when finished. If the grates are cast iron, make sure to oil them before your next cook. Deep cleaning cast-iron grates like this may cause them to lose a little of their non-stick properties. But, it’s essential to keep them clean. - Source: Internet
- If your grill has a porcelain enamel coated lid, use Simple Green or Purple Power to remove grime. To deep clean the lid, use 0000 super-fine steel wool with these cleaners, scrubbing gently to restore the original shiny enamel finish. Wipe residue with a damp cloth and dry thoroughly. See Cleaning Porcelain Enamel With Steel Wool for details and photos of the process. - Source: Internet
- Turn all burners to HIGH and burn-off the grates for 10-15 minutes. Use a grill brush to clean the top side of the grates. Let the grates cool enough so you can handle them safely with grilling gloves then flip them over and brush the back side. Remove the grates and set them aside. - Source: Internet
- Your grill’s cooking grate is one of the most important parts of your gas barbecue. Because It comes into direct contact with your food, grill grates have a significant impact on how your grilled meal turns out both visually and flavorwise. Not only do they aid in heat transfer, which helps you achieve those coveted perfect grill marks, the grids can also impart flavors to food—though not always ones you want, particularly if the grates are dirty. - Source: Internet
- Clean the charcoal grate. If you have a kettle-style grill, use the grill brush to clean the charcoal grate, dipping the brush in warm, soapy water as needed. - Source: Internet
- When you cook, two things can build up on your grill: grease and carbon. Left for too long and not cleaned off, the grease can get rancid, vaporize with heat, and leave a foul taste to your food. The grease can also become a food safety issue if left uncleaned for too long. The carbon forms a black crust on your grates and other components and can quickly leave a burnt taste on your food. It also makes it a lot easier for your meat to stick to the grates. - Source: Internet
- Burnt-on food residue can leave an unappetizing coating on your outdoor grill grates. Wiping down the grates after each use minimizes the buildup, but you should still deep clean those grates at least once a year at the end of the backyard grilling season. If you use your grill year-round, twice yearly deep cleaning is necessary. A standard oven cleaner breaks down the residue regardless of how badly it has built up. The cleaner can damage the grill if it isn’t used properly, though. - Source: Internet
- Make sure to have all the grates and rotisseries removed from the burner. You can do this by removing the burner. It is easier to have it cleaned when it is detached from the actual product. Make sure not to leave any grates to be assured that even heating will be given out by the product the next time you are cooking. - Source: Internet
- Heat up the grill to burn off any excess food, then turn off the grill and let it cool. Using a soft bristle brush, brush diagonally across the grates in smooth, fluid motions to remove food and debris. Diagonal motions make it easier to remove food and grease, but be careful not to scrub too hard or you risk damaging the surface of the grate. For deep cleaning, mix a solution of 6 parts baking soda and 2 parts warm water and apply the paste to the grates. Let the paste sit for 20 minutes, then clean with a soft bristle brush. - Source: Internet
- Once you finish cleaning the burners, before they are returned, make sure that they are dry. This will prevent water spots. If it is still wet, it can affect the quality of the food the next time you use the griller. - Source: Internet
- For gas grills, you want to at least wipe down the grill after every use. At least once a year, you want to give your grill a very thorough cleaning. This means going through and removing parts while cleaning through all the crevices. A good tool for you to use in cleaning your gas grill is a grill-cleaning solution. There are many brands, but make sure to get a cleaner that is specifically meant for grills and follow the instructions. - Source: Internet
- When cleaning your grill or smoker, the grill grates is always the first place to start. After using high heat and getting the grates nice and hot, once they’ve cooled to a moderate temperature, the main goal is to scrape off any remaining residue and carbon char. This can be done in several ways, including: - Source: Internet
- With proper care, cast iron grill grates can last a long time. Cast iron grates should be cleaned and seasoned after every use to keep them non-stick and resistant to rust. Follow these steps to clean cast iron cooking grates: - Source: Internet
- Using your backyard grill means less mess in your kitchen, but scrubbing charred and grimy grates after a big cookout can be a beast of a chore. If you skip the job altogether, you risk dangerous flare-ups from dripping grease and lingering flavors that can ruin your next batch of food — and that’s not to mention the embarrassment that comes when friends and family see their meal being prepared on a dirty grill. And while a great grill brush is an essential BBQ tool, a brush can only do so much. You also need a great cleaner to help restore and thoroughly clean the cooking grates. - Source: Internet
- GRILL SPOT TIP: Yes, it’s safe to occasionally use dish soap to clean cast iron! Sometimes, you need dish soap to help lift difficult debris. If you do clean your grates with dish soap, take extra care to re-season them properly—soap can strip away the non-stick surface that develops when you bake oil into the iron. And never soak cast iron in soapy water (or any water!). - Source: Internet
- Most of the time, your standard dish soap just isn’t strong enough to properly clean your grates, especially if you’ve neglected them all winter long. Many online tips insist the best way to clean grill grates is with a mixture of vinegar and baking soda, but that can take up to an hour to start working. Lastly, and perhaps most importantly, avoid using cleaning products with harsh chemicals when cleaning your grill, as they can leave behind a toxic residue that can end up on your food. - Source: Internet
- Cover your grill. Keep your grill covered when not in use. Most brands make their own covers, which of course have to be bought separately, but they’re well worth it. Protecting your grill from the elements keeps it from rusting and becoming dirtier than it needs to be. - Source: Internet
- The hardest part of replacing a grill grate is to find the right size and material for your grill. When you’re replacing a grill grate, we recommend looking for a replacement grate that uses the same materials as your grill’s original manufacturer. As long as you get the right size, you can also swap your current grill grates for a new one that uses a different material. - Source: Internet
- If you own a grill or smoker, such as a Gravity Series® Grill, that has cast iron grill grates, you’ll be happy to know that these types of grates are durable, can handle high heat, and create even cooking surfaces. Cast iron grates can handle just about anything but are prone to rusting if they are exposed to water. To clean, turn your grill or smoker to the highest setting and burn off any food left over on the grates. Then, let the grates cool and use a grill-safe brush to scrub them clean. Once they’re clean, wipe dry and apply a thin layer of vegetable oil to prevent the grates from rusting. - Source: Internet
 Following are some suggestions on where to begin your search for data on Clean Grill:
You should try to find 8 Best Grill Cleaners for Every Kind of Barbecue Mess, Tested by Experts-related information from reputable places. Libraries, online resources, and even paid journalists all fall under this category.
Following are some suggestions on where to begin your search for data on Clean Grill:
You should try to find 8 Best Grill Cleaners for Every Kind of Barbecue Mess, Tested by Experts-related information from reputable places. Libraries, online resources, and even paid journalists all fall under this category.It’s crucial to be aware of the many electronic media sources available when researching how to clean the cast iron grates on a gas grill, such as Google and YouTube. You may also get info about Grill Seasoning Oil on social media sites like Facebook and Twitter.
Video | How To Clean The Grates On A Gas Grill
It’s crucial to read to examine the authenticity of each source in order to acquire the greatest information regarding Clean Grill. You’ll learn more about how to clean the grates on my gas grill after watching the films included in this post, which come from a variety of different sources. Information on a wide range of topics may be easily accessed via the internet.
## Notable features of cleaning the grates on a gas grill include:- How To Clean The Grates On A Gas Grill
- How To Clean The Grates On A Bbq Grill
- Cleaning The Grates On A Gas Grill
- How To Clean The Grates On A Weber Gas Grill
- How To Clean The Cast Iron Grates On A Gas Grill
:max_bytes(150000):strip_icc()/Kona_360_Clean_Grill_Brush_04-12244b74ac434963a9e721c25dba38cb.jpg)
Because there are so many websites and forums that provide information about Deep Clean Weber, it should not be difficult for you to locate the data that you want.
The majority of individuals are accustomed to taking a completely different approach when it comes to obtaining information regarding How to clean a gas or charcoal grill and keep your grill grates gunk-free. This makes it possible to take a more in-depth look at the information that is available about How To Clean A Grill Or Smoker Properly and how it might be utilized.

methods for producing information displays about Perfect Steak Grill that are both aesthetically pleasing and functional. In commercial and marketing settings, as well as for the purpose of conveying information on How To Clean Weber Grill – Quick Tips About Cleaning Genesis II Gas BBQ, they are useful tools to have. Because of this, we also supply some photographs relating to Scrub Daddy Grill Brush.
In summing up, I’d like to say that this article offers a general summary of how do you clean the grates on a gas grill. Also covered are Weber Faq and how do you clean the grates on a gas grill, which serve as a benchmark for evaluating the depth of your understanding of How To Grill.
